Fine-tune and use your own model
In this tutorial you fine-tune a small model that triages sanctions screening alerts, check it with a quality gate, publish it to your own Hugging Face account, and then use it in a small web app on your computer.
It takes about 10 minutes of your time plus the run itself, which depends on where you run it.
What you build
The Sanctions alert triage template trains a model to act as a first-line (L1) sanctions screening analyst. For each alert (a customer who partly matches an entry on a sanctions list), the model answers:
Decision: ESCALATE
Rationale: 'Hussain Haddad' and 'Husayn Al Haddad' are transliteration variants of the same name and the date of
birth 1953-03-29 matches exactly. Cannot be discounted: escalate.
The template ships with a synthetic sample of 400 alerts: 302 labeled CLOSE and 98 labeled ESCALATE. None of the people in it are real.
The pipeline has ten steps:
| Step | What it does |
|---|---|
| Load dataset | Downloads the 400 sample alerts. |
| Clean and dedupe | Removes duplicates and redacts personal data such as email addresses, phone numbers and IBANs. |
| Format as chat | Builds a prompt from each alert's fields, with a system prompt ("You are an L1 sanctions screening analyst…"), and the expected answer from the decision and rationale. |
| Train / validation / test split | Keeps 15% of the alerts for testing and 5% for validation, with the same share of ESCALATE and CLOSE in each part. |
| Base model | The model you start from. |
| Fine-tune (SFT) | Trains a LoRA adapter with QLoRA for 2 epochs. |
| Evaluate on test set | Answers the test alerts with the fine-tuned model and the base model and scores both. |
| Quality gate | Lets the model through only if it is accurate enough. |
| Publish and register | Pushes the adapter to your Hugging Face account and adds it to your model registry. |
| Deploy endpoint | Starts a paid serverless endpoint for the model. You remove this step below. |
Before you start
- You have completed Your first pipeline in 10 minutes, or at least know how to start a run.
- You have a Hugging Face account.
- You have somewhere with a GPU to run the pipeline: your own NVIDIA GPU, a Kaggle account, a Modal account, or a Hugging Face account with billing. See step 5 for the options.
1. Add a Hugging Face write token
The pipeline downloads the base model and pushes your adapter to your Hugging Face account, so it needs a token that can write.
- On huggingface.co, open Settings → Access Tokens and create a token with the Write role.
- In Tuneline, open Settings → API keys and find the Hugging Face card.
- Paste the token (it starts with
hf_) into Access token and save it. - Select Test. Tuneline checks the token and fills in your Hugging Face username in Settings → Profile. Your models are pushed under that account.
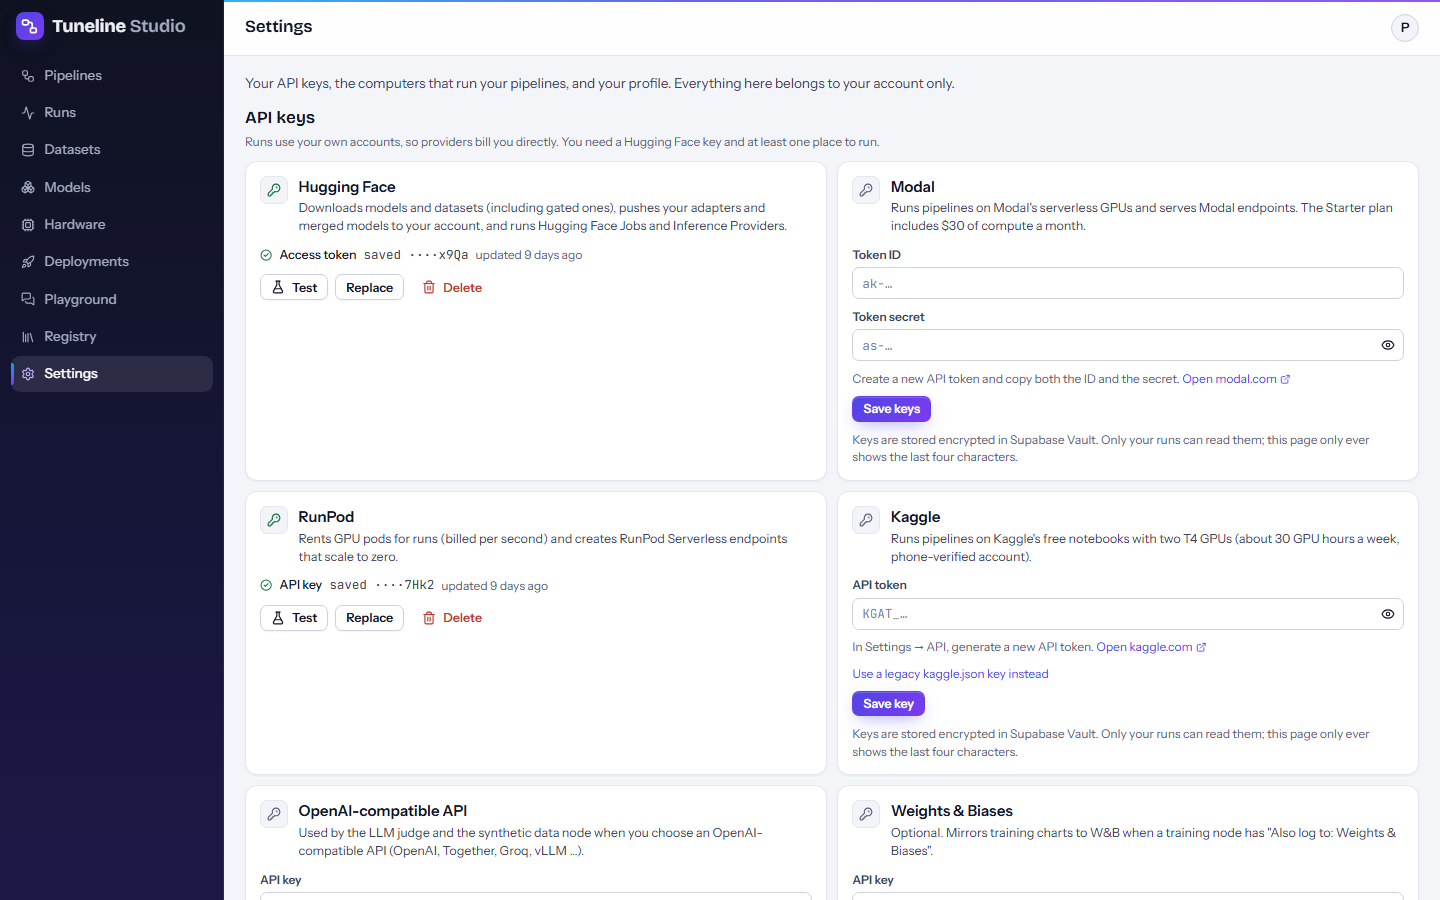
Tuneline stores the token encrypted and only ever shows its last four characters. See API keys and security.
2. Create the pipeline from the template
- Open Pipelines and select New pipeline.
- Choose Sanctions alert triage. Its card shows 10 steps, GPU, and the keys it uses.
- Keep the name Sanctions alert triage. The name decides your model's repository name: this one becomes
sanctions-alert-triage. - Select Create pipeline.
3. Pick a smaller base model
The template starts from Qwen/Qwen3-4B-Instruct-2507. A smaller model trains faster, fits on smaller GPUs and
answers faster on a CPU later.
- Click the Base model step on the canvas.
- In the inspector, open the Model field and type or paste
Qwen/Qwen2.5-1.5B-Instruct. You can also pick a model from the catalog or search the Hub from there.
Any small instruction-tuned model works. The Models page lists each model's license, size and memory needs.
4. Remove the Deploy endpoint step
The last step, Deploy endpoint, starts an OpenAI-compatible endpoint for your model. Endpoints cost money while they run. By default it uses RunPod Serverless, which needs a RunPod API key; you can switch it to Hugging Face Inference Endpoints or Modal, which are also paid. You don't need an endpoint for this tutorial: the app in step 8 runs the model on your own computer.
- Click the Deploy endpoint step.
- Select Delete node in the bar under the canvas (or press Delete).
The pipeline now has nine steps and needs only your Hugging Face token. You can deploy the model later from the Registry or Deployments page. See Deployments.
5. Run it
Select Run and choose where to run in the Run pipeline dialog. The Hardware section shows how much GPU memory training needs and, for cloud providers, the estimated time and cost on each GPU.
| Where to run | Cost | What you need | Notes |
|---|---|---|---|
| My computer | Free | A connected computer with an NVIDIA GPU with 8 GB of memory or more. See Install. | For a 1.5B model, QLoRA needs about 3.8 GB of GPU memory and LoRA about 5.8 GB. |
| Kaggle (free) | Free | A Kaggle API token in Settings → API keys, from a phone-verified Kaggle account. | Two T4 GPUs; about 30 GPU hours a week. Slower, costs nothing. |
| Modal | Paid per second; the Starter plan includes $30 of compute a month | A Modal token ID and secret. | The first Modal run builds a job image, which can take several minutes. |
| Hugging Face Jobs | Paid; about $0.15 for this run on an L4 at the time of writing | Your Hugging Face token, and billing (credit) set up on your Hugging Face account. | Check the estimate in the dialog; live prices are on the Hardware page. |
QLoRA on Windows
If you run on your own Windows computer and the training step fails while loading bitsandbytes, either run the
worker under WSL2 (Ubuntu), or select the Fine-tune (SFT) step and change Method to
LoRA (16-bit base + LoRA), which doesn't need bitsandbytes and still fits in 8 GB for a 1.5B model.
Select Start run. For cloud targets, Tuneline opens the run page; for My computer, select Open the run page once the dialog says your computer has picked the run up. You can also follow the run from the banner above the pipeline canvas.
6. Check the quality gate
The Quality gate step holds two rules:
label_accuracyis the share of test alerts where the model's decision (ESCALATE or CLOSE) matches the label. The first rule asks for at least 90%.label_recall_escalateis the share of true ESCALATE alerts the model also escalates. The second rule asks it to catch at least 98% of them, because closing a real match is the costly mistake.
If both rules hold, the model goes on to Publish and register. If either fails, the gate fails the run and nothing is published. (You can change this in the gate's When a rule fails setting.)
To see how the model did, open the run page and select the Evaluation tab. It shows each metric for the fine-tuned model and the base model, the difference, the gate's decision, and sample answers side by side. The report appears when the evaluation step finishes.
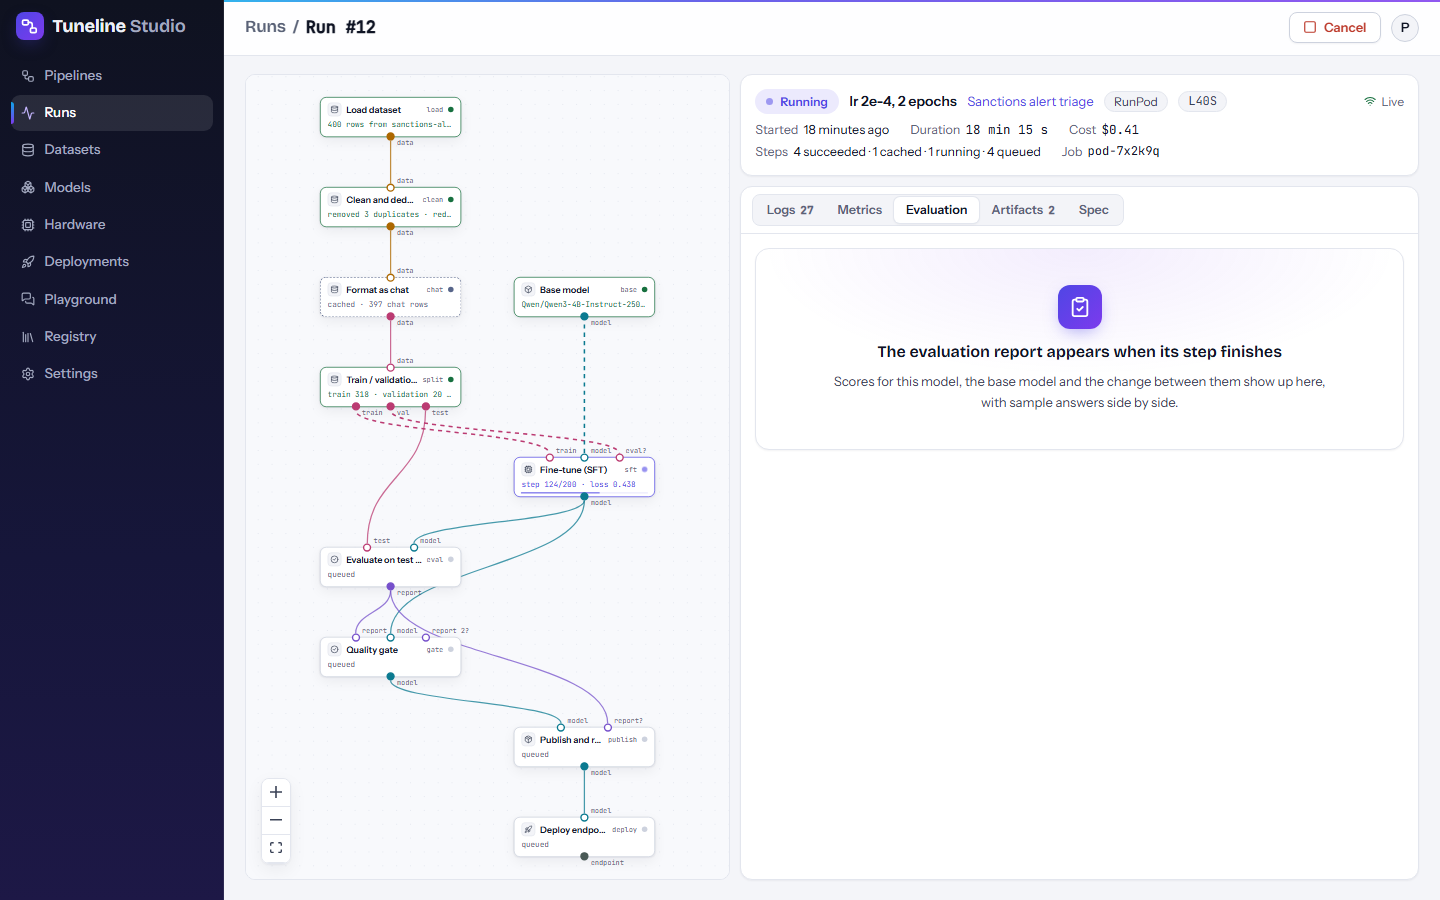
What to expect: the fine-tuned model should score clearly higher than the base model on label_accuracy, and it
should answer in the Decision: … / Rationale: … format that the base model often doesn't follow. Results depend on
the base model, the settings and the run; with only 400 synthetic examples, a small model may not reach the 98%
recall rule on the first try. If the gate fails, try a larger base model, more epochs, or LoRA instead of
QLoRA, and compare runs on the Runs page. See
Evaluation and quality gates.
7. Find your published model
When the gate passes, Publish and register:
- pushes the LoRA adapter, with a generated model card, to a private repository
<your-hf-username>/sanctions-alert-triagein your Hugging Face account; - adds it as a new version in your Registry, linked to the run that produced it and its evaluation metrics.
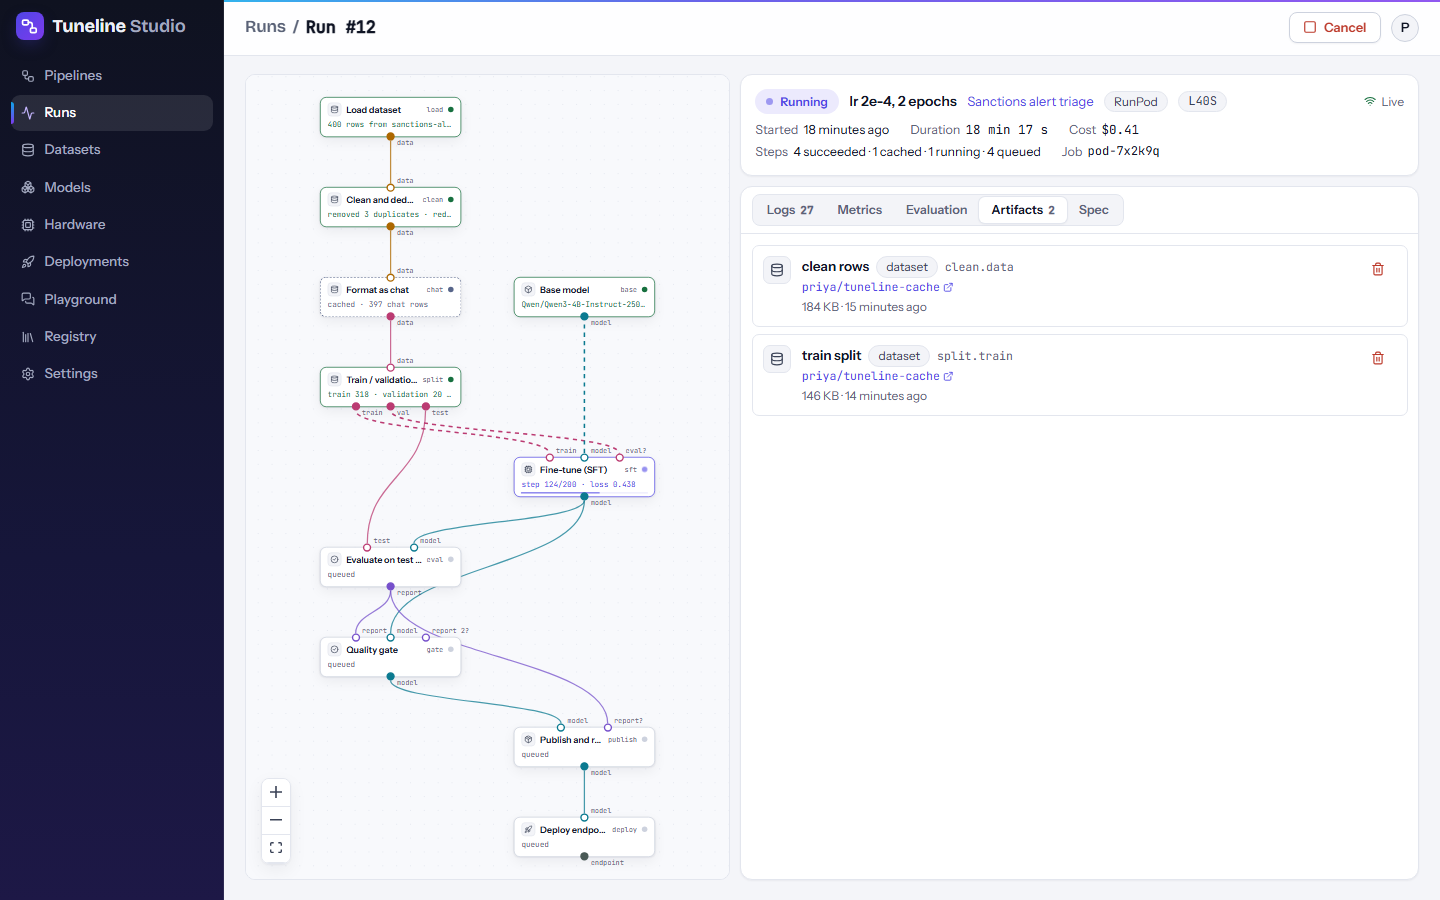
Open the run's Artifacts tab for the links, or the Registry page to see the model and promote it to staging or production. See Registry.
Note
By default the Fine-tune (SFT) step also pushes its adapter to a private working repository
(<your-hf-username>/sanctions-alert-triage-adapter), so later steps and other machines can reuse it. Private
repositories stay visible only to you.
8. Use the model in an app
The Tuneline repository includes an example app, the Alert triage desk
(examples/alert-triage/app.py). It downloads your adapter from Hugging Face, attaches it to its base model on your
computer, and gives you a form for entering an alert. For each alert it shows the decision, the rationale, how long the
model took, the exact prompt it sent (with personal data redacted) and the model's raw output.
The app builds prompts exactly like the pipeline's training data: the same system prompt, the same prompt template and the same personal-data redaction as the Clean and dedupe step. That matters: a fine-tuned model works best on inputs that look like what it was trained on.
Set up
The app runs from a copy of the Tuneline repository with its Python environment, because it reuses Tuneline's prompt template and redaction code.
-
Get a copy of the repository and install the training stack. On Windows, from the repository folder:
On macOS or Linux:
bash scripts/setup-dev.sh --runner. This creates.venvwith PyTorch (CPU build), Transformers, PEFT and the web server the app uses. The script needs Python (3.12 recommended) and, because it also builds the Tuneline web app, Node.js 22 LTS. -
Let the app read your private repository. Either sign in once with the Hugging Face CLI:
or set a token for the current PowerShell session:
A read token is enough here.
Run it
.venv\Scripts\python examples\alert-triage\app.py --adapter <your-hf-username>/sanctions-alert-triage
On macOS or Linux use .venv/bin/python examples/alert-triage/app.py --adapter …. Then open
http://127.0.0.1:7860.
The first start downloads the base model, which can take a few minutes; the page says Loading model… until it is ready. Pick one of the examples (Likely match, Different person or Borderline) or fill in your own alert, then select Triage alert.
| Option | Use |
|---|---|
--adapter <repo> |
The adapter to load. Its configuration names the base model. |
--adapter "" |
Load the base model only, without your adapter, to compare. |
--base <repo> |
Use a different base model than the one in the adapter's configuration. |
--port <number> |
Serve on another port (default 7860). |
On a CPU, a 1.5B model answers in about 14 seconds per alert; with an NVIDIA GPU it is much faster.
Why fine-tuning matters
Run the app once with --adapter "" to try the untrained base model. In our test, the untrained 1.5B base model got
an obvious exact-match alert wrong: it answered CLOSE for an alert that clearly had to be escalated. That is the kind
of mistake the quality gate's recall rule is there to catch, and the reason to fine-tune and evaluate on your own
examples before you trust a model.
Warning
The sample data is synthetic and the model is a demonstration. Don't use it for real screening decisions without training on your own reviewed data, evaluating it properly and keeping a person in the loop.
Next steps
- Train on your own alerts: upload them on the Datasets page and use them in the Load dataset step. See Datasets.
- Serve the model behind an OpenAI-compatible endpoint: Deployments.
- Chat with the model and save good answers to a golden set: Playground.
- Compare costs and GPUs before a bigger run: Hardware and costs.